Moles can cause major problems on your lawn, especially if you’re trying to grow a vegetable garden. Like any garden pest, it will only get worse with time unless you do something about it. Hiring a pest control service seems like the best solution for mole infestation. But if you’re on a limited budget, it’s not a good option. A better alternative is to set up mole traps which are both cheap and effective.
Any mole trap won’t do, however. To get rid of moles you need the best mole traps in the industry. Since we care about your garden’s health, we’ve made a list of the top craftsmen mole traps.
Here is our list of top mole traps of 2023
| Image | Product | Dimension | Price |
|
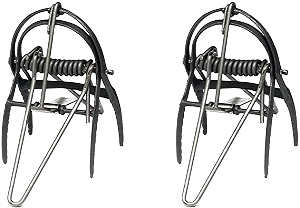
Victor Out O’Sight Mole Trap (0631) |
5.58 x 2.83 x 8.48 in |
|
|
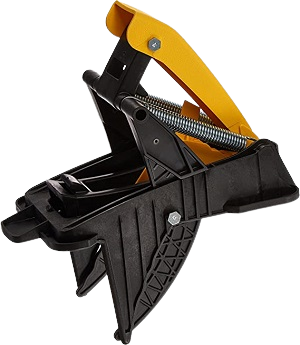
Tomcat Pro Grade Mole Trap |
9 x 6 x 9.38 in |
|
|
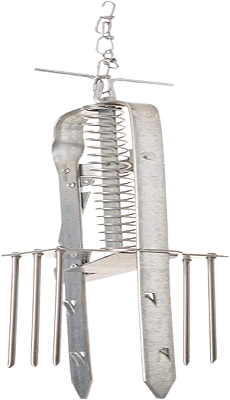
Victor Plunger Style Woodstream Mole Trap |
12.99 x 5.38 x 13.97 in |
|

|
Black Hole Rodent Trap |
9.02 x 7.28 x 3.46 in |
|
|
Wire Tek 1001 Easy Set Mole Eliminator Trap |
10 x 4 x 6 inches |
1. Victor Out O’Sight Mole Trap (0631)
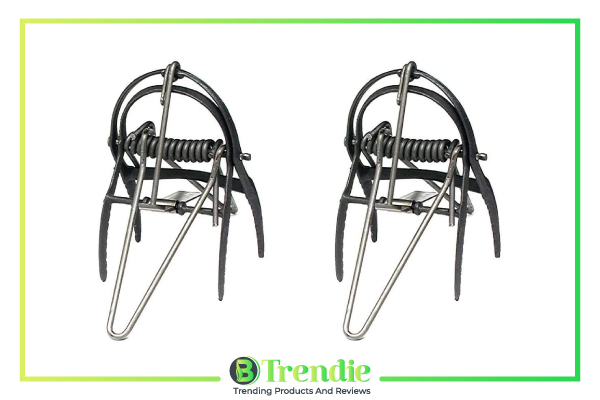
Victor touts it as the “professional’s mole trap of choice”. But if we look at it, the mole trap seems no more than an ordinary contraption with metal parts put together. That being said, you shouldn’t let its simple design fool you. Us, we found it to be effective and extremely reliable. It doesn’t come without flaws, although they can be easily overcome.
The Good
Starting off with its construction, Victor Out O’ Sight is made of durable and weather-resistant metal for long-lasting life and reusability. Its jaws are made of malleable iron and lend it a tight grasp as soon as it’s set off. The package includes setting levers, a safety clip that allows for its safe placement, as well as an illustrated manual that details the proper setting and placement of the trap – something that any first-time user will absolutely love.
Out O’Sight is exactly how it is described – it is hidden from plain sight. The trap is to be placed in a tunnel opening and covered with dirt to hide it. Instinctively, the mole will attempt to clear the opening by digging it out, causing it to fall right into the trap. It’s that simple – and it really does work when strategically placed.
No assembly is required with this mole trap. It’s ready to use straight out of the box. It’s also compatible with different types of soil including sand. The best part is, you get all these goodies for a sweet price of $11.
The Bad
Safety seems to be an issue with Victor’s Out O’ Sight Mole Trap. We’ve proven it to be safe during placement while the safety pin is still on. Once it is removed, however, pets and children who enjoy playing in the garden are at risk of getting caught between the sharp jaws. This is because you can only place the device up to several inches below the ground within tunnel openings. For curious pets and children who might dig into or step on them, this isn’t nearly deep enough to keep them safe. To avoid accidents, you’ll have to cover the trap with a large bucket and a weight placed on top of it.
The illustrated manual is a nice touch but sadly, it won’t increase your chances of catching a mole. It teaches the basics but it doesn’t tell you how to outsmart moles. So instead of using a single trap, you might end up buying more than needed. For people who don’t enjoy leaving a bloody mess in their garden, it isn’t a nice choice either. This trap was specifically designed to kill moles by drawing blood.
Tips for Using Victor Out O’ Sight Mole Trap
If you want to successfully catch a mole (without having to buy more than one trap), start by stamping out all tunnels in your yard. It doesn’t seem to be a good idea at first, but it forces existing moles to create new ones. This will give you a current picture of their tunnels. As soon as the mole digs new tunnels, your next step is to identify the main route. It is a long straight tunnel where moles frequently pass through – and therefore the best place to set the trap.
2. Tomcat Pro Grade Mole Trap (BL34152)

It doesn’t appear to be your average mole trap. The plastic material and bright paint easily give it away as something out-of-the-ordinary. However, its extraordinary features go beyond aesthetics and extend toward practical functionality. These combined features easily make it one of the best craftsman mole traps in the trade.
The Good
Tomcat Pro Grade Mole Trap is made of plastic – an unusual material even for its kind. Most mole traps are made of metal, but not this one. There are no sharp edges on this device, so it won’t cause any blood to spill. It relies on a dual-spring action to instantly kill the trapped mole with immense pressure. Due to this Biosafe feature, it is considered an ethical way to deal with moles as garden pests.
You shouldn’t underestimate its plastic body. It may look like a toy, but it is in fact a heavy-duty device built to last. It is made of tough nylon, a resilient type of plastic that doesn’t easily break. We were even able to reuse it a few times. The bright yellow pedal has its practical applications as well. It allows hands-free placement and makes it easier to spot in case you need to replace the trap. Yes, you read correctly! You can safely move this mole trap without hurting yourself. To do this, simply disengage the trap before moving it to another tunnel.
It is very easy to use. People who’ve never used mole traps before will appreciate its effortless setup. To install, simply place its jaws within the tunnel, then step on the yellow pedal to trigger the trap below the ground’s surface. Once it’s made a capture, the pedal will act as a signal and spring right back up to its original position. This will let you know that the trigger was activated, and since it has a bright yellow color, it’s unlikely that you’ll miss it.
The Bad
There have been complaints that Tomcat Pro Grade Mole Trap breaks after one or several uses. For a device that costs $18, it sounds pretty bad. But there have also been users who raved about its quality, which evens out the playing field. However, if you’re not willing to spend as much on a mole trap you may never be able to reuse, we don’t recommend buying this. You will be better off with steel mole traps which are not only cheaper but also more durable.
Tips for Using Tomcat Pro Grade Mole Trap
Catching moles is very simple with this device. You can increase your chances by moving the trap to a different location every 12-24 hours. Anyway, it’s safe to move around. Keep doing this until you successfully trap a mole.
3. Victor Plunger Style Woodstream Mole Trap (0645)

Out O’ Sight may be the choice of professionals, but this plunger-type model is something even your grandparents would swear by to. Victor’s Woodstream Mole Trap has a classic design that’s been proven to work for decades. Given its track record, we’ve included it in our list of must-have mole traps for every gardener. In terms of safety, it has a clear advantage due to its mechanism.
The Good
With proper installment, it’s probably the safest mole trap to use around kids and pets. Its sharp spears can only be expected to push downwards instead of sideways, where it will less likely to grab their delicate fingers, feet, paws, or snouts. We willingly tested this device in our garden (we have two dogs who love digging up holes, by the way) and have had no problems with it. Even if they did manage to set off the trap, they wouldn’t be in harm’s way since the spears are pointing down. The safety pin is a welcome feature that adds to the mole trap’s overall safety. It prevents the gadget from firing off during setup or in reaction to false alarms.
It may be an older model but Victor’s Plunger Style Mole Trap is easier to clean in between uses. The huge gaps in between spears give enough room for wiping with a towel. The trap works rather quickly and effectively too. It has barbs that prevent the trap from jumping off the ground when triggered. Once it’s caught a mole, you’d be able to tell because the spring will be down. Whereas other mole traps are impossible to set near walls and garden beds, this one fits in tight spaces without any problem.
Despite its name, Woodstream is made of weather-resistant steel. No matter how long you place it underground (and even when you leave it out in the rain), it won’t rust or break apart that easily. By the time you need to replace it, the trap would have already caught several moles. And that’s not too bad since it will only cost you $17 on Amazon.
The Bad
We’ve had a lot of good things to say about Victor’s Woodstream Mole Trap but like all the rest, it isn’t perfect and has its shortcomings. One of its most obvious faults is a difficult setup. Sure, no assembly is required and it does come with an illustrated manual, though such things are easier said than done.
Another drawback is that it doesn’t work well with loose, soft, or sandy earth. If this is the case, you have to find ways to keep it on the ground or it will jump into the air as soon as it’s set off. To do this, you can drill holes in its arms and attach small strings, then tie them down to stakes pierced into the nearby soil. When applying this workaround, remember to spring the trap several times to ensure that the spikes drop freely.
Tips for Using Victor Plunger Style Woodstream Mole Trap
Find a good place to set the trap. Ideally, it should be the middle of a tunnel which the mole will likely use again. Using your hands or feet, gently push down the grass to collapse the tunnel, then place the trap. You can set it by pulling up the handle spring at the top, and engaging the small lever to hold the spring in place. Carefully place the flat piece of the trap on the ground – it has to rise up enough to catch the trigger arm. That way, when the mole pushes through the collapsed tunnel, the flat part will release the arm trigger and cause the plunger to push down with its metal spears.
4. Nash Choker Loop Trap (100)
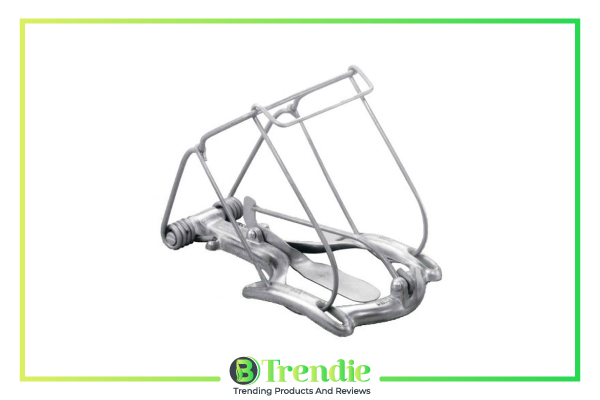
It is one of the “older” mole traps still available in the market today. Having stayed on the radar, this should give you an idea of how well it works. The Nash Choker Loop Trap continues to be among the top craftsman mole traps you can choose from. Although not as popular as Victor and Tomcat, Nash offers a decent alternative with this simple contraption. What we like about this trap is that it doesn’t cause any more damage to your lawn than the moles already have.
The Good
Durability was never an issue with this product. It has galvanized steel construction which protects against rust and weathering. The cast aluminum base is tough but malleable enough for the spring action. You should be able to reuse it without any problem. Like Victor’s Plunger Style Mole Trap, it was also made for easy cleaning. However, there are no sharp edges on this one, so you won’t hurt yourself in the process.
Setting it up is easy once you get a hang of it. Other traps require you to dig into a tunnel and that usually destroys your lawn even more. With Nash’s 100 Mole Trap, you only need two slots on the ground to fit in the trap’s wire loops. Once it’s trapped a mole, it doesn’t leave a mess in your garden which some would appreciate. A mole escaping is also unlikely – the trap has a very tight grip. It’s safe to use around pets and children, though we’d recommend placing something hefty on top to prevent accidental triggers.
When it comes to price range, it isn’t the cheapest one you will find, but it’s definitely affordable at $26.
The Bad
Setup can be a pain at the onset. As we’ve mentioned earlier, it takes some getting used to, probably because it works differently compared to other craftsmen mole traps. Tunnels should also be visible if you want a quick and easy setup. Otherwise, you have to look for them first. Pest control experts argue however that Nash’s 100 works best for mole species that dig closer the ground surface. So it’s important you do some research first before purchasing this mole trap. For everyone else, what you can do is drive a vehicle around the garden to flatten the ground. You will know which tunnels are active because the earth will be raised in those areas once the moles push it back up again.
The lack of a safety pin makes it bothersome to set up as well. Once you crank the trap, there’s no way that you can place it on the ground without the risk of injury. Thankfully, there are no barbs or spears on this trap. The most you can get is a bruised hand or foot caught between the loops.
Tips for Using Nash Choker Loop Trap
First, you must find an active tunnel in your garden. The next step is to cut two vertical holes along its sides – they should be deep enough to fit the trap’s wire loops. You can use a spade for this. While staked to the ground, rock the spade sideways to create enough room. Once this is done, carefully lower the trap into the slots just so it rests on top of the tunnel. Then, cock the trap and gently collapse the ground where the trigger is located. Due to the lack of a safety pin, careful handling is a must.
The safest way to cock the trap is to step on it. If you choose to do so, place a small block of wood beneath the front of the trap. This will prevent it from being pushed too deep into the ground, which makes the trigger less sensitive and the entire trap less effective.
5. Black Hole Rodent Trap

This widely popular brand is mainly used for trapping gophers, but it is far more versatile than you would imagine. In addition to catching moles, it was designed to trap a wide range of rodents including moles and rats. Needless to say, the Black Hole is the only trap on our list with a broad scope of pest control solutions. It’s a great choice for seasoned gardeners who want the best value for their money.
The Good
The Black Hole features a cylindrical shape that imitates a gopher tunnel. If you’re used to seeing actual gopher tunnels, you’ll realize this trap is twice the size – and that’s not exactly a bad thing. If you are dealing with more than one pest in your garden, this trap can get you pests that are about the same size or larger. Aside from gophers, it’s known to be useful against rats and moles.
It is durable enough to last a few uses, with some saying it can even last up to two or three years. Setting up is easy with this trap, though you may have to dig a hole bigger than the existing tunnel. Another advantage of the Black Hole is that it’s easy to maneuver in tight spaces. We had no problems fitting it inside tunnels located beside walls. If you do it right, you’ll be able to catch a mole in no time. At roughly $19, it isn’t the cheapest but it’s still a good find.
The Bad
Unlike a box trap which doesn’t have a bottom, the Black Hole’s full-bodied plastic and large size are often too obvious for the mole. We had to “prime” the soil and place some on the bottom so the mole wouldn’t sense the trap. Bait is also needed for this trap, which some would consider a deal breaker. This means you need to spend a few extra dollars to successfully catch a mole. For some, using bait to lure unsuspecting pests isn’t much of a problem. But if you want an easy catch, it’s best that you opt for mole traps and the bait required.
While others attest to its durability, this trap is by no means perfect. The trigger mechanism is unfortunately a mix of plastic and steel, and the plastic parts tend to break after one or several uses depending on your luck. So if there are several moles in your garden, we would advise you to get more than one of these traps.
Tips for Using Black Hole Rodent Trap
Activate the trap by placing the spring bar across the spring, and inserting the end of the trigger bar across the spring. Then, insert the end in the trigger hold and release it gently. It is now ready for setup and you may choose to add bait if you like.
The trap is much larger than a mole tunnel, so you need to displace soil just to get it in. If you don’t want the mole to suspect anything, it is advised that you put some soil on the bottom of the trap. After installation, cover all cracks with soil to keep light from entering the trap. But try not to place too much – the vent hole located at the back needs to be free from obstruction, so as to let air enter.
6. Wire Tek 1001 Easy Set Mole Eliminator Trap
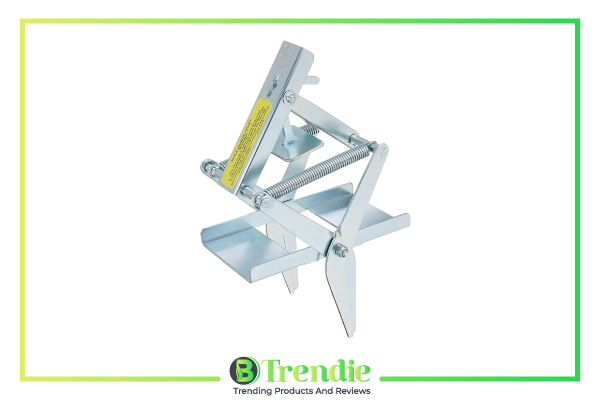
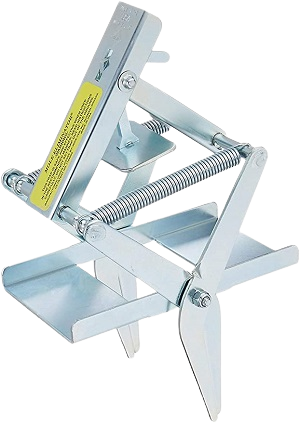
It is our top pick and undeniably the best of the best craftsmen mole traps available for pest control. It’s not one of the cheapest mole traps you can get, but we guarantee that it is worth its price. Wire Tek 1001 earned the top spot for its quick and easy installation, safe usage, and of course, its effectiveness in catching those buggers.
The Good
One major flaw of mole traps is they take time to set up. In addition to finding active tunnels, they require you to do a little digging. The worst kinds involve setting up sharp spears, dangerous cables, clamps, prongs, or tongs! All these put you at risk of injuring yourself during setup. Wire Tek 1001 eliminates the need for all these and allows for easy installation – the easiest we’ve tried. Moreover, there is no need to use bait, poison, or any other intervention. The trap can be used alone to successfully catch moles. It is also safe to use around children and pets, with all moving parts located underground if properly installed.
Its construction is sturdy. Made of 100% galvanized steel metal, it is tough enough to make an instant kill as well as last a lifetime. Despite its heft, Wire Tek Easy Set Mole Eliminator is easy to spring. It works great on loamy earth and thick turf but can be used on a wide range of soil types including sandy soil.
The set comes with an instruction manual – not that you’d need it. However, it is something that first-time mole-catchers would appreciate. It also includes a manufacturer’s warranty which is uncommon among cheap mole traps.
The Bad
The only drawback of Wire Tek 1001 is its price. Sold for roughly $37 per set, it is 2 to 3 times more expensive than most mole traps we’ve reviewed. Considering all its other advantages, it is well worth its price since you can reuse the trap countless times.
Tips for Using Wire Tek 1001 Easy Set Mole Eliminator Trap
To install, simply locate an active tunnel. Find a spot that doesn’t have nearby trees or plant roots as they could prevent the jaw from opening during setup. With your hands, set the trap on the tunnel until the base is forced into the earth. Next, use your foot to step on the setting lever; this will trigger the mechanism.
You can move the trap to another location but you’ll have to trigger it first. You can do this by dropping it to the ground. The force will cause the jaw to open and for the trap to spring up.

